Traveller Session 6
- Game Date
- 142-1105
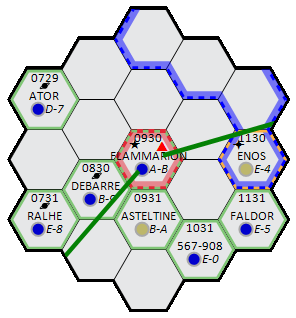
- Location
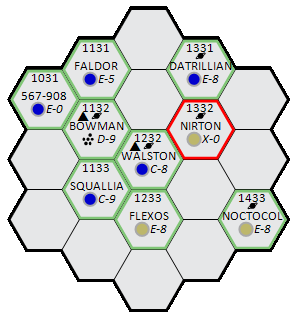
- Walston
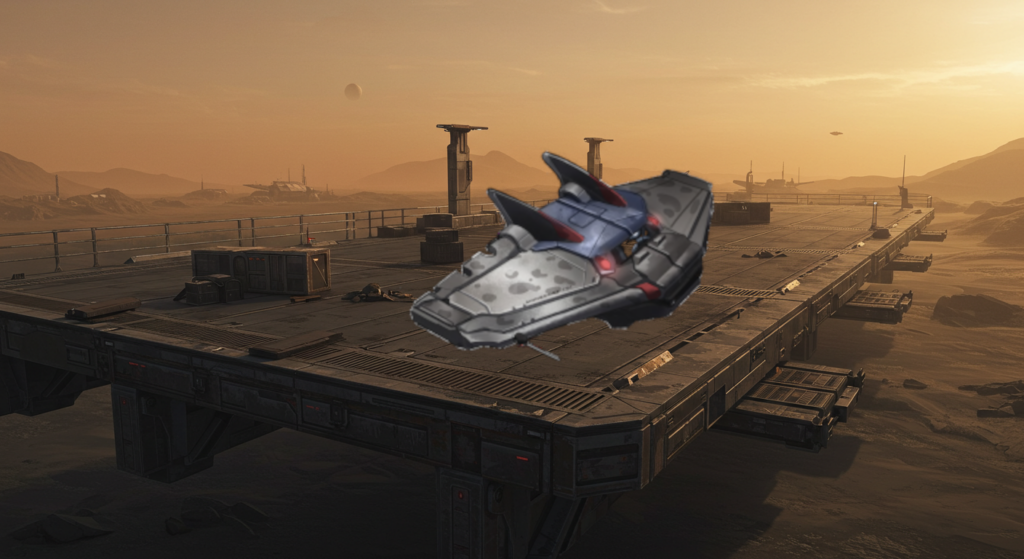
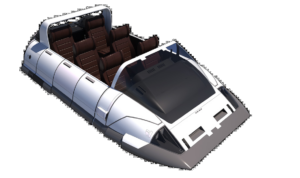
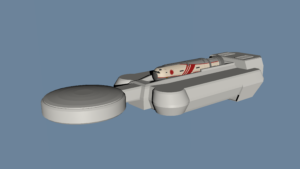
The Vagabond's Hope ready to be repaired at Walston's Starport
142-1105: You've found that thin atmospheres are a problem for you and must avoid long exposure (say over an hour in a day). You've set the internal atmosphere of the Vagabond's Hope to a standard atmosphere which has alleviated your symptoms even though that does stress the damaged life support electronics. Fortunately one of the set of replacement electronics is for the life support. If the air locks are not operated the air pressure (and oxygen) on the Vagabond's Hope will last a few hours even if the life support is temporarily off.
142-1105: It's now a few days after the eruption of Mt. Salbarii. You've been granted free access to the Star port’s (limited) facilities and have been put up in the star port town's hotel for free while you (a) fix the ship, (b) assist with shuttling supplies between the star port and the capital or (c) trying to keep Kimbley under control (or, at least, not devouring anything and everything).
There are several systems that the computer has flagged as needing attention and you needed to tell the computer to override the "Only attempt use of this system in the case of dire emergency, your warranty will be void and no liability for any eventuality will be accepted":
- Life Support
- Flight Controls
- Navigation
- Power System Electronics
- Drive System Electronics
The warning for the Jump Drive is both better and worse: "WARNING: Jump Drive disconnected from Jump Emitters - JUMP DRIVE OFFLINE - This cannot be overridden".
Junebug has discovered that Kimbley is demanding a lot of attention in order to avoid it getting in absolutely everybody's way.
Kimbley had to be wrangled out of the way but we have discovered that he may have been chewing and most certainly has been drooling over some parts of the ship, he is now safely out of everyone's way allowing repairs to be carried out.
- Life Support systems took 3 hours to repair and is now giving us a green light.
- Power Systems Electronics took 4 hours to complete.
- Navigation Systems, Earl makes an attempt at getting these fixed and does a reasonable job but it is not at full spec. Flight Controls take 5 hours to complete
This takes us into the evening and Masuyo having repaired the Life Support has prepared us a decent meal with pasta meat and sauce. After dinner we receive a message from the oligarch Masterton inviting us to a banquet being held in our honour at the capital to thank us for our efforts in rescuing the residents of Salbarii after the eruption. We have a couple of drinks and head to bed for the night.
The next morning I decide to have a look at the Drive systems electronics and manage to get them reconnected and we now have a working Jump Drive, I have no idea how well it will work but we can Jump. We have computer confirmation of an active Jump Drive, this has taken most of the day. Whilst I am working on the Jump Drive Earl has another look at the Navigation Systems, taking most of the day but he is much more successful this time around and it fully functioning.
Whilst those of us who have repair work to carry out Tharbin takes the time to head back into the Star port to gather all of our personal belongings and to collect our cargo to bring back to the Vagabonds Hope. Masuyo also heads in to visit the Merchant Service to get us some cargo to carry back to 567-908 and hopefully earn us some more credits. She States that we are leaving in a couple of days and manages to procure 5 tons of cargo for us to take, delivery expected the next day, after checking for any further opportunities she calls it a day with what we already have.
- Maneuver Drive is the only system left to be repaired, which is taken on by Chase and again taking most of the day is successful in repairing it.
The Ship is now in a reasonably flight worthy state, we are uncertain how flight worthy but she will fly. Cyndariel takes this opportunity to inform me that she attempted to make some repairs in the engine room whilst I was indisposed, but broke something, possible spark plugs. She proudly informs me that she has cleaned them up nicely and is now keeping them as souvenirs in the Med Bay???
Note to All crew: "NO-ONE TOUCHES MY ENGINE"
After the repairs are done we all retire to get ready for the banquet, we arrive at the Capital via train and are welcomed in. Masterton thanks us for completing the survey and for our efforts with the rescue during the eruption. The banquet proceeds, it is a relatively intimate affair with members of Masterton’s family and the ruling "Council" members of Walston along with Alan Greener, Masuyo lets Alan know that she wished a private meeting with him tomorrow.
The political situation surrounding Walston comes up in conversation and I zone out as I have no interest in it, so I cannot comment directly on what was discussed exactly, but I do remember a lot of ships entering the system and refuelling at the gas giant and then jumping back out of system totally ignoring the local Star port, being mentioned. I also remember hearing the Walston is Pro Imperium but is reluctant to officially join as this would make the a target considering their position in the universe.
After the banquet is over we all head back to the Star port and the ship.
The next morning Tharbin and Masuyo go back to the Capital to see Alan Greener in regards to our fee for completing the survey as requested, and he seems a little nervous. He agrees that our contract has indeed been fulfilled and offers us remuneration for said contract but Masuyo expresses her displeasure at the figure offered, Tharbin then adds that surely our efforts in helping to rescue the people of Salbarii deserve some consideration on top of the survey money. Alan then offers 15,000 credits, they both feel this is somewhat begrudged and more than Alan wanted to offer us but Masterton may have had some influence here. They accept the offer believing that this is the best offer we will get and state that we may well return this way at some point and Alan replies with a positive response. They return to ship to find that the cargo has been delivered and stowed and we are ready to depart. Masuyo makes a quick call to the Merchant hall but no new cargo options have come up.
We get clearance for take off and we fire up the engines and are only marginally successful with our take off we are moving but very slowly, we continue with the proviso of diagnosing the problem when we reach space. We get an on-screen message informing us that the servicing for the Maneuver Drive needs to be completely overhauled within a month, at our current rate of travel it will take us all day to reach 100 diameters in order to make our Jump to 567-908. Once we arrive at our target area the Jump is plotted and we make it into Jump Space with no further issues. Whilst were in Jump Space we all decide to take on some training to keep us occupied and to improve our skills:
- Masuyo
- Steward
- Cyndariel
- Medical
- Fiorana
- Engineering
- Earl
- Pilot(Small Craft)
- Chase
- Vacc Suit
- Tharbin
- Vacc Suit
- Junebug
- Animal Handling
After the week in Jump Space, which was relatively uneventful, we return to normal space and immediately pick up a faint G-K signal, an automated distress call from ship called the Vigilant Star, which has suffered a malfunction in Jump Space. The current location of the ship is ten diameters away from our current position, we let them know we have heard their distress cal and will be sending help but we are going the send the Launch as we have our own ship issues and need to land ASAP. We check in with the planet to see if they have received to same distress call and have they already sent aid, we get confirmation that the message has been received but unfortunately they are in no position to offer any assistance for lack of facilities.
Masuyo radios ahead to inform the planet the we will send help for the other ship with our Launch explaining that the Vagabonds Hope needs to land as we have our own issues that require landing as soon a possible, the ground crew agree and thank us for helping in any way we can. Masuyo, Chase and Tharbin stay with the Vagabonds Hope while the rest of us prepare to board the Launch to assist as much as we can. We move the ATV aboard the Launch into the multi-environment area on the right of the cargo hold, before loading the launch up with supplies we might need.